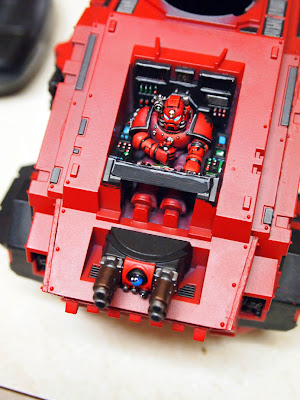
In part 5 of Build a Stormraven, after priming everything Dragon Red and magnetizing the wings, I started to paint the details on the ship. First I put a base coat of black on all areas that I wanted to be black or Boltgun Metal.
The first parts that I actually wanted to do finished detail work was the cockpit, top turret and top intake vent so I could glue the canopy on the cockpit and glue together the top turret.
Next up was doing detail work on the wings. For Dragon Red/Gory Red, GW's Blood Red makes a great highlight color. So after filling all the groove lines with Black Ink (Badab Black?), I did highlight line work along all the sharp edges and lines with Blood Red. For the areas painted Chaos Black, I used a 1:1 mix of Chaos Black and Codex Grey for the highlight lines. For the jet engines and turbine fans on the wing tips, I did a base coat of Boltgun Metal and then did a heavy wash of 1:1 mix of Black Ink/Wash and Water. After that I drybrushed the engines and turbines with Boltgun Metal to remove the "inkspots" and still leave the black ink in the recessed areas.
After doing the line work I added paint chip battle damage. I tried to make it look like these hits happened while the ship was at a high velocity so I gave them a directional streaky brush stroked. First I layed down whatever the highlight color of Blood Red. After the shape is established I used the 1:1 mix of Chaos Black and Codex Grey inside that shape making sure to leave the original highlight color's edges visible. Lastly, I put Boltgun Metal inside to show and exposed metal.
In the next installment I'll show some of the detail work done on the icons for the wings and sides of the ship....


This looks amazing! Keep up the great work.
ReplyDelete